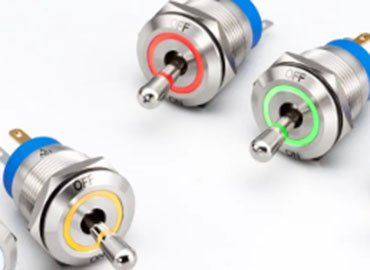
Among many control electronic devices, two-way toggle switches are widely loved for their convenience. They control the connected lights or devices from two locations instead of one.
In many regions, they are titled three-way switches. When it comes to wiring, it seems challenging, but it is not.
You must understand basic terminals and wiring options with the essential tools. Today, we will discuss how you can connect a two-way toggle switch to your devices.
What Is A Two-way Toggle Switch? How Does It Work?
A two-way toggle switch controls the lights from two different ways and locations. They have two directions of current flowing through the circuit, and making it happen.
Here is how a two-way toggle switch works.
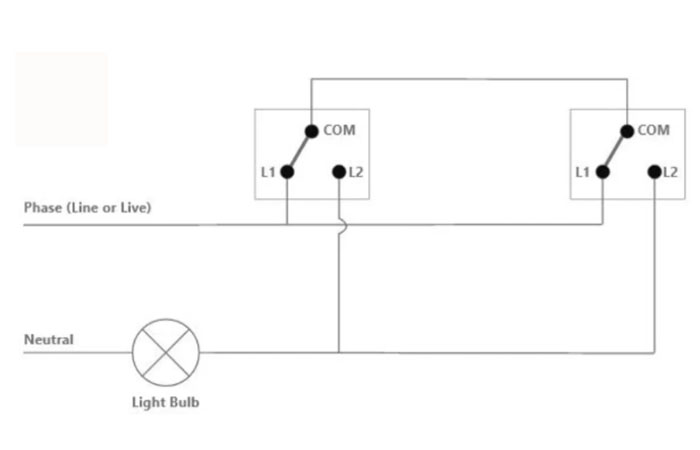
- There is one common terminal (COM) and two routing terminals (L1 and L2)
- COM is a common terminal that lets the power flow.
- L1 and L2 are two pathway terminals allowing the direction of current.
The toggle switch can switch the path and control the on/off status of the lighting system.
Tools and Materials Required
Before you start connecting the toggle switch to your light system, here are a few tools required with their key functionality.
- Screwdrivers and pliers – For tightening screws and handling wires.
- Wire stripper and cutter – To remove insulation and trim wires.
- Voltage tester or multimeter – This checks live circuits and safety.
- Two two-way switches – The main control components.
- Electrical box and cables – To house the switches and connect the circuit.
- Safety gloves and goggles – For personal protection while working with electricity.
Step-by-step Guide to Wire A Two-way Toggle Switch
Once you have the right tools and connected the wires, here are a few steps to deal with the two-way toggle switch wiring process.
Step 1: Identify COM, L1, and L2 Terminals
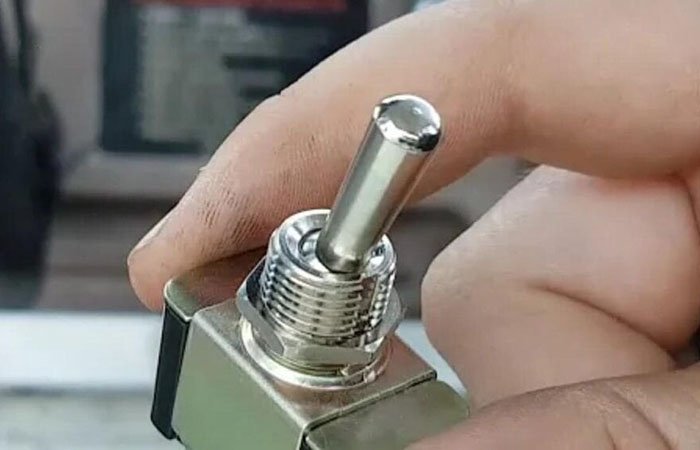
The switch has three terminals: COM, L1, and L2. Check the back of the switch to identify the labels and markings. If there are no markings, you can check the manual to determine the right terminal for proper connection.
Step 2: Connect The Live Wire to The COM on The First Switch
COM is the standard terminal where the current flows. You have made the first connection here. Link the live wire with the COM terminal.
Step 3: Link Traveler Wires between L1 and L2
L1 and L2 are traveler wires and don’t work for the live wires. Connect the L1 traveler terminal of the one switch with the L1 of the second switch through the cables. Do the same with the L2 of one and second switch.
Step 4: Connect The Load Wire to The COM on The Second Switch
Connect a new wire to the COM terminal of the second switch and the other end of the wire to the live terminal of the light.
Step 5: Secure Connections and Cover Plates
Tighten all the connections and cover up the systems. Place them carefully into the electrical box for better safety and stability of the electrical system.
Step 6: Test The Circuit for Proper Function
Don’t skip this step. Turn on the power source and check for the current flow and control of the lights. You can verify that the COM, L1, and L2 terminals work fine with the right connections with your dual light control features.
Standard Wiring Mistakes to Avoid Wiring
During DIY wiring, people often make crucial yet straightforward mistakes. It leads to the failure of the systems. Here are a few mistakes you should avoid.
Power Was Not Turned off before Wiring.
Before you make the connections, you should turn off the power supply. Otherwise, accidents might happen due to the flowing current. However, you can test it with a voltmeter or multimeter to confirm that the power is off.
Mixing Up Traveler Wires
L1 and L2 are traveler and crucial wires. Wrong connections can mess up the whole power supply system. Therefore, you should connect the L1 of one switch with the L1 of another. Do the same with the L2 terminals.
Loose Connections
Loose connections cause mishaps. They can cause short circuits or might cause flickering lights. Use screws and make them tight.
Wrong Wire Gauge
The wrong wire gauge is the main reason behind the overheating of the lights. You should choose the compatible and the right size of the wire gauge.
Missing Ground Wire
A ground wire guarantees safe connections. In the modern electrical system, ground wires are a necessity. You should never miss the ground wire and ensure a safe wiring system.
Skipping Testing after Installation
Once you have connected the wires, you still have the most crucial task left. It is the testing of the systems. If there are errors, reconnect and make the connections right.

FAQs
1. Does it matter which wires go on which terminal on a two-way switch setting?
Yes. It matters. A live wire should connect to the COM terminal to let the power flow.
2. How does a two-way toggle switch differ from a single-pole switch?
A single-pole switch is a simple plug-and-play system that controls devices from one direction. You can connect any wire to any terminal. A two-way toggle switch requires careful placement of cables and controls light from two locations.
3. How do I identify live and neutral wires before wiring?
You should use a voltage tester or multimeter. A live wire has the current and shows the reading, while a neutral wire completes the circuit.
4. Can I wire a two-way switch for controlling outlets instead of lights?
Yes. You can control outlets instead of lights, but ensure proper wiring on the correct terminals to avoid mishaps.
Conclusion
A two-way toggle switch is a simple setting when you identify the terminals. Before making connections, always turn off the power. Use a multimeter or voltmeter to measure the current flow.
Once you link the terminals, always test the system for wiring accuracy.