Wiring a single-pole switch is so common and straightforward that a homeowner can DIY install it. Pack all the necessary tools and materials and begin your first DIY installation.
In this step-by-step guide, we will discuss installation and safety tips for single-pole switches.
Why Splice Wires to A Single-Pole Switch?
A single-pole switch can control your lights and multiple other simple home devices. Turning on the single-pole switch can provide us with some basic features and much more. Here it is:
Basic Light Control
A single-pole switch provides one-way routing of current to the basic lights. Turning on or off can cause the shutdown of the lights and provide better control of your home lights.
Safe And Easy to Operate
Safe operation of a single-pole switch requires concise and secure wiring. Do proper boxing of the wires and connections, and ensure safety.
Easy Upgradation
A single-pole switch is straightforward and can be upgraded or replaced whenever needed. Easy upgradation makes it a favorite in home installation setups.
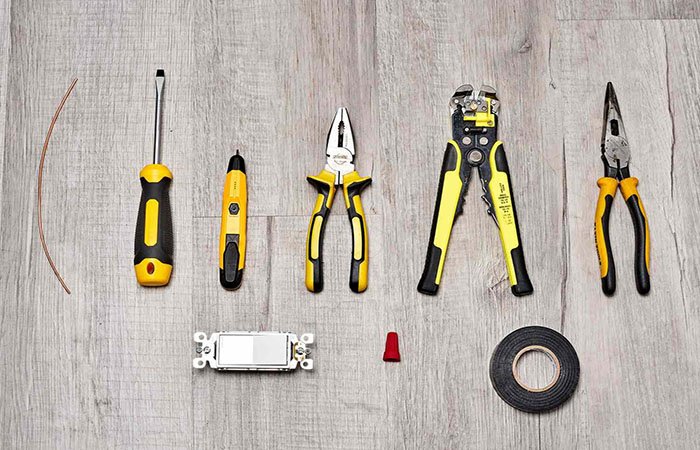
Materials And Tools Needed to Wire a Single-Pole Switch
Installation of a single-pole switch requires multiple tools and materials. We have made a comprehensive list.
- Single-pole switch—your main device to install
- Screwdriver—a tool to tighten up the nuts and make connections secure
- Wire strippers—remove the insulation of cables
- Voltage tester—test the active voltage in the circuit
- Electrical tape—secure connection
- Wire nuts—fix the loose ends
Step-by-Step Guide to Wiring a Single-pole Switch
Are you ready to sail on your first DIY installation activity? Follow the five steps only.
Step 1: Turn off The Power
If you have a power source connected, turn it off immediately. To verify it, you can use the voltage tester and check for any voltage.
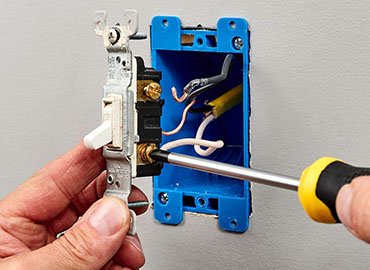
Step 2: Remove The Old Switch or Bring a New Switch
If this is your first time installing, get your new single-pole switch on the desk. Use the wire stripper to remove ¾ of the wire insulation and make new connections.
If you already have a switch installed, remove its connection and use the voltage tester to verify power again.
Step 3: Connect Wires
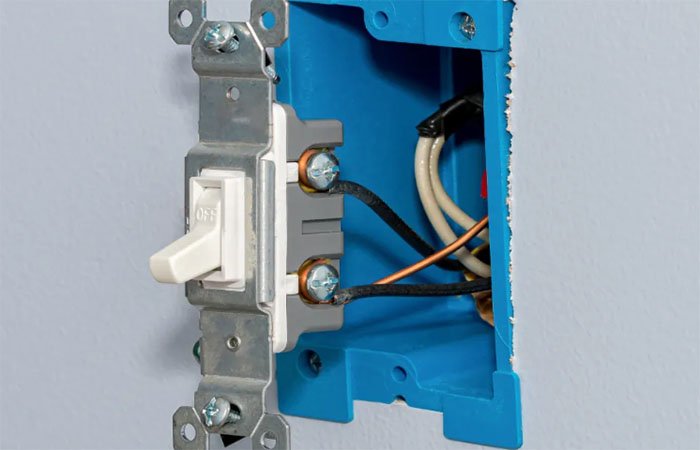
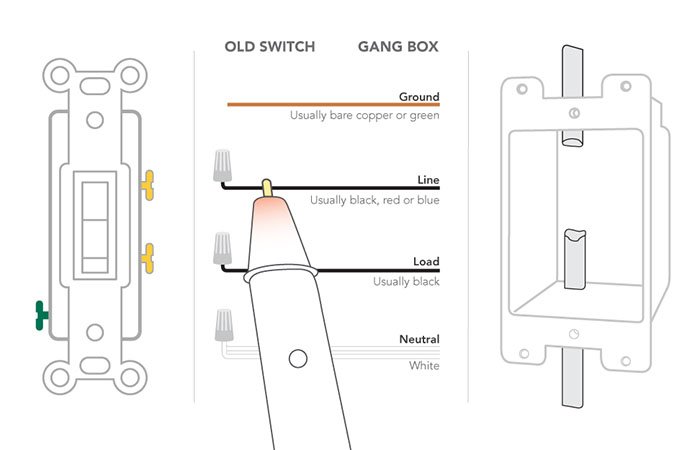
- Find the hot wires in black. Connect to any of the terminals on the single-pole switch.
- Ensure the hot is ⅔ bare at the ends and bend it into a C-shape loop and wrap it on the terminal.
- Find the white wire and connect it with a wire cap. Never connect it to the switch! If the white wire is labeled with black or red tape, it is a hot wire, not a neutral one.
- If there are grounding cables in green colors, you can connect to the grounding terminals.
Step 4: Secure Switch
Have you made all the connections right as per instructions? Here is more to do.
- Tug on all the wires and make them tight so they don’t loosen.
- Once all the connections are secure, place the wires back into the electrical box.
- Screw the switch into the box and make it secure.
Step 5: Test The Power
Now, turn on the power supply connected to your single-pole switch. Test the switch by turning it on and off multiple times.
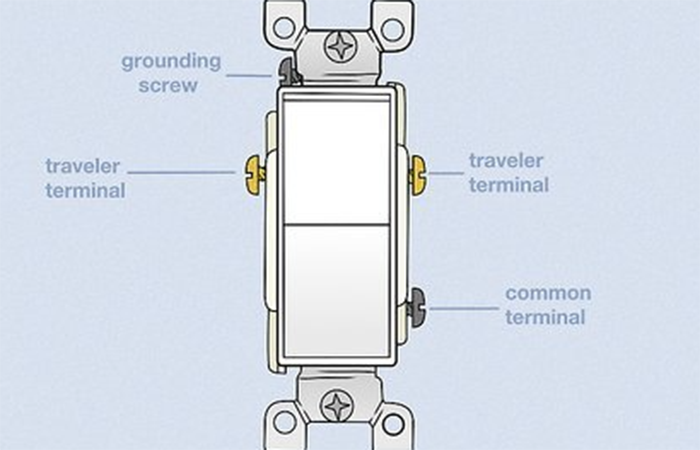
Two-wire Setup vs Three-wire Setup of a Single-pole Switch
There are two types of wire combinations in the installation of a single-pole switch. One is a two-wire setup, and the other is a three-wire setup. Let’s discuss!
Splicing Wires
Wiring is the crucial difference between the two types of wiring setups.
Two-wire setups have two common wires connected in the switch. One is hot and the other is the neutral wire.
The three-wire setup has three wires. You find the grounding wire of green color in the three-wire setup.
Common Usage
There are two fundamental power routes. The first is to switch to light fixtures. The second one is from direct power to light fixtures.
Two-wire setup follows the first principle. Power source supplies the switch. Then the switch sends power to the light. If you turn off the switch, there is no current flowing to the light fixtures.
In three-wire settings, the current flows from the power source to the light fixtures directly. It helps control multiple lights simultaneously.
Safety Tips to Avoid Mishaps on The Single-pole Switch
When installing the single-pole switch, you should ensure safety. Here is what you can do.
Always Turn off Power
Turn off the power supply from the circuit breaker. Sometimes, false connections can let the current flow. Go one mile extra by disconnecting live wires and testing the power supply with a multimeter.
Use Insulated Tools
Bare tools can catch the current and cause electrical damage. Since you are playing with electrical circuits, go for the insulated tools to ensure safety.
Follow Local Electrical Codes
There are rules and regulations in every area and region. You should learn the local rules and follow the electrical codes for the single-pole switch installation.
FAQs
1. Is it possible to install a single-pole switch without a ground wire?
Yes. But you should not practice the installation with a ground wire as modern codes require the users to have a ground wire for safety.
2. What is a common single-pole switch configuration?
A two-wire single pole configuration is typical nowadays with a separate grounding of the electrical box and switch. It helps control a light fixture with simple turn on and off.
3. What is a line and load in a single-pole switch wiring?
The line is the route of power from the power source to the switch. When switching routes the current to the light fixtures is called a load.
4. Which color wire is specific for a light switch?
There is no specific color marking for the connection. You can connect any wire to any terminal and link the second wire to the opposite terminal.
Conclusion
Installation of a single-pole switch is straightforward if you know the wire combinations and connect them properly. Such connections are typical at home and might be handy. Therefore, practice safety and follow our steps and tips to get the right connection at your house!