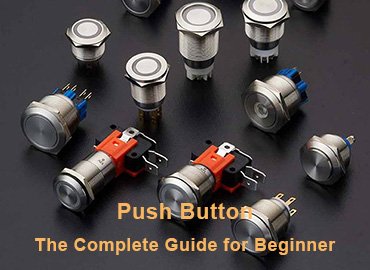
Push button switches are very common in life and production. This article introduces push button switches in detail to give you a comprehensive understanding of it. Whether you’re a newbie or an expert, you can learn more about them.
What Is Push Button Switch
There are many common switches in life, such as wall switches, tact switches, sensor switches, pressure switches, micro switches, toggle switches, and push button switches.
Push button switch is a relatively simple mechanical device used to control the activation or deactivation of various functions in machines and equipment. Push button switches are typically made of metal and plastic materials.
Push button switches are generally used on instruments or equipment to control equipment functions or control current. They are rarely used alone, so they are commonly found in cars, home appliances and other equipment in daily life.
In industry, it is mostly used for functional operation and startup and shutdown of machines. It is a very important electrical component. Push button switches have many functions, and you can choose different types and functions according to actual needs.
How Push Button Switch Work
The push button switch achieves the purpose of turning on or off the instrument by pressing or touching the actuator of the button to allow current to pass or break. It is a relatively simple mechanical or electronic operating mechanism. It mainly implements this working principle through the following components:
Shell and actuator: The shell of the push button is mainly made of a combination of metal and plastic, and is mainly used to prevent damage and insulation.
Silver contacts: Generally made of silver-copper alloy, the silver content reaches more than 85%. It needs to be riveted on the brass parts with a rivet machine. When the current passes through, it can better connect the line and has high conductivity. When the current is cut off, it can be separated quickly.
Spring mechanism: When the button is pressed, the spring prompts the contact to connect. In the self-returning state, the spring rebounds. In the self-locking state, the buckle will lock the actuator head and the spring will not rebound.
The push button switch mainly switches on or off the current through these components, and will appear in the ON or OFF state.
The characteristics of push buttons are numerous, and here are a few common features:
Simple operation
Just press or touch the button to operate the switch. After pressing the button, it remains pressed and needs to be pressed again to change the state, this is a self-locking function. After pressing the button, the actuator springs back immediately without having to operate it again. This is a momentary function. But if it is electronic type, the actuator will not have any change, but the pressure will enter into the button inner and act momentary or latch function.
High Safety Factor
High safety factor: The metal button switch is made of metal, which is very strong and durable, with high protection level and long service life. It does not require frequent replacement and maintenance, and it has different voltages and currents. Plastic push button switches are mainly composed of PBT, PA and PC, with higher insulation performance. Switches are generally tested and inspected repeatedly to ensure they can be reused and are safer.
Diverse Functions
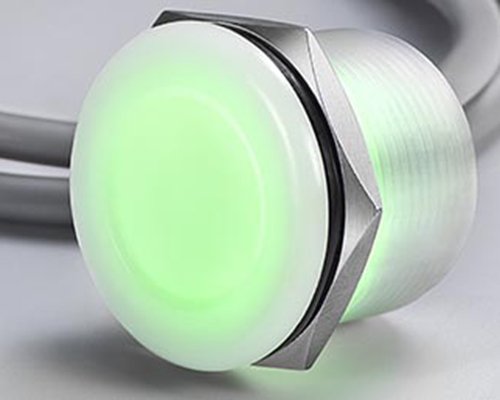
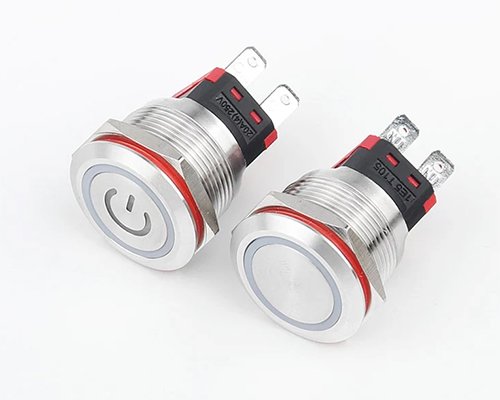
The function selection of the switch is very diverse. In addition to latching and instantaneous options, there are also normally open, normally closed, SPST, SPDT, DPST, DPDT and other functional options. You can even choose the light pattern and color for the LED function… Plus, it’s waterproof and resistant to the elements.
Strong aesthetics
Whether it is a plastic or metal button switch, their different colors and materials give the switch different vitality and are perfectly integrated with the instrument.
In short, buttons have many advantages and are one of the indispensable electrical parts in life and production. If you are interested, please continue reading.
What Types of Push Button Switch
The application scenarios of push button switches are rich and the classifications are also very diverse. Classified by function, common ones include:
By Function
Latching: After pressing the switch button, the push button switch will remain in the pressed state, and the instrument will continue to operate. The actuator will not return to its original state until pressed again.
Momentary: Press the actuator of the push button switch and release your hand, the button will return to its original state.
Normally Open (NO): Usually the «ON» sign is used to indicate normally open, which is a state of the contact, indicating that the contact is not connected when the contact is not energized.
Normally Closed (NC): Normally closed is usually represented by the «NC» mark, which means that the silver contacts are closed, the circuit is open, and the machine is running. If the button is pressed, the current is turned off and the circuit is disconnected. For example, the stop button of the escalator uses this function.
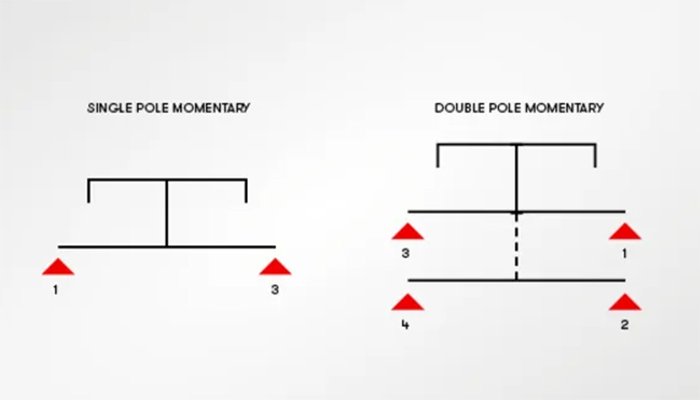
SPST: That is, single pole single throw, it only controls one circuit, connects two terminals, and has only two states: on or off. Switches with this feature are not durable and need to be replaced frequently, so they are more suitable for simple circuits, such as household light switches.
SPDT: That is, single pole double throw, which controls a circuit but connects three terminals, so it is suitable for selective control applications, such as switching between two circuits.
DPST: That is, double pole single throw, with four terminals, can control two circuits at the same time but cannot switch, nor can it control one circuit alone. Suitable for applications where two circuits are switched off or on at the same time, such as the main power supply for household appliances.
DPDT: That is, double pole double throw, which has six terminals and controls two different circuits, including two input terminals and four output terminals, which are independent of each other. Compared with the other three functions, the DPDT switch is the most advanced kind.
By Materials
Plastic materials
Classified according to materials, plastic push button switches include several materials. The main crust is PA and the base is PBT. Nylon (Nylon, Polyamide, PA for short) refers to a plastic composed of polyamide resin and is resistant to high temperatures. PBT is a thermoplastic engineering polymer used as an insulator in the electrical and electronics industry. The base of the metal push button switch is made of PBT material for better insulation and flame retardancy.
Metal materials
Metal materials include stainless steel 304, stainless steel 316L, zinc alloy, nickel-plated brass, and anodized aluminum. These materials can be made into metal button switches. The use of metal as the appearance of the shell material, better protection and support of internal parts, play a better role in waterproof and dustproof, play the maximum role of the parts and extend the service life of the switch.
To sum up, there are many types of switches and they are widely used. In addition to functional classification, there are other methods such as classification by material or classification by type of operation. If you are interested, you can search for more related articles.
By Structure
Mechanism types
The interior of the mechanical button switch is composed of springs, silver points, contacts, connecting rods, LED lights, waterproof rings and other materials, including ordinary push buttons and anti-vandal push button switch.
Electronic types
Electronic switches include piezo type and capacitive switches, which are mainly composed of integrated circuit boards, wires, integrated shells, waterproof transparent rings and other materials.
What’s The Purpose of Push Button Switch
Whether in daily life or industrial production, push button switches mainly have the following purposes:
- Control circuit: The most basic function of the push button switch is to control the circuit. Operating the switch can turn on or off the current, thereby controlling the startup or shutdown of the device.
- Function selection: There may be multiple functions on a device. Different push buttons close or open different functions. Such as a car control panel, a remote control, an elevator, etc.
- Safety application: It is often used to control or stop equipment in emergencies, control equipment accidents, and prevent accidents from causing uncontrollable situations and affecting personal safety and property safety.
- Diversity: There are many types of push button switches. Different devices use push button switches with different functions, and the selectivity is very wide.
Button switches are also rich in functions used in different scenarios. If you want to know more details, you can search for more related articles to read.
How to Use Push Button Switch
The use of push button switches is divided into three steps, namely installation, operation and maintenance. The specific operations are as follows:
Installation
- Before installation, be sure to disconnect the power supply, select a suitable location, and determine whether the aperture size is appropriate.
- Connect the wires, connect the corresponding positive and negative wires, and make sure the connections are correct.
- After connecting the wire to the selected position, tighten the nut of the switch to ensure that the switch is not easy to loosen.
- Make sure that after the push button switch is installed, turn on the power and check whether the switch is connected correctly. If it has an LED function, check whether the indicator light is on and whether the switch function is normal. If there is a problem, cut off the power supply and check whether there is an installation error or the switch itself is damaged. If it is the latter, communicate with the supplier as soon as possible to find a solution.
- If everything is running normally, the switch installation is complete.
Operation
As long as the wiring is successful, the operation is very simple, just press the button head.
Maintenance
Keep the surface of the button switch clean and gently wipe the dust with a rag. Check whether the nut is loose and whether the switch connection is electrically correct.
In summary, operating a push button switch requires a safe environment and correct steps to function effectively. If a switch is not operating correctly, check which step might be problematic.
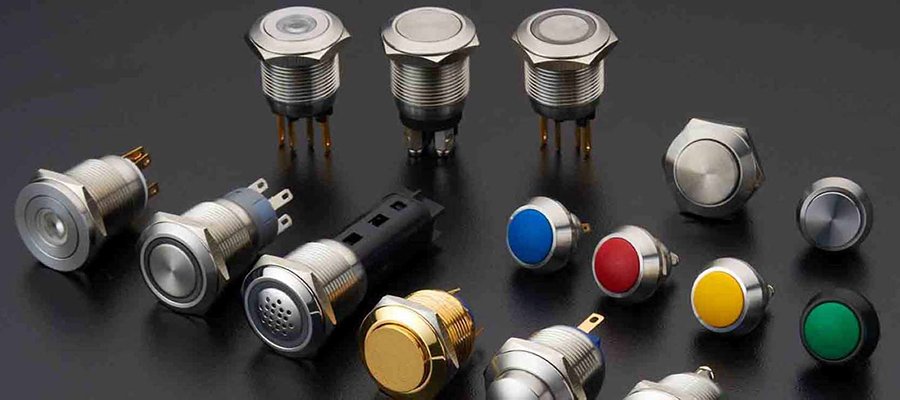
What Push Button Switch Shapes Are Available
Push button switches have different appearances because their design must adapt to the specific application environment, so there are several common shapes:
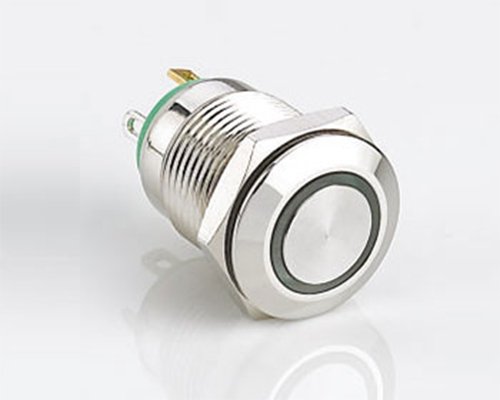
Flat Head: The entire head and actuator are round and flat. Depending on its function, the operator retracts or springs back when the button is pressed.
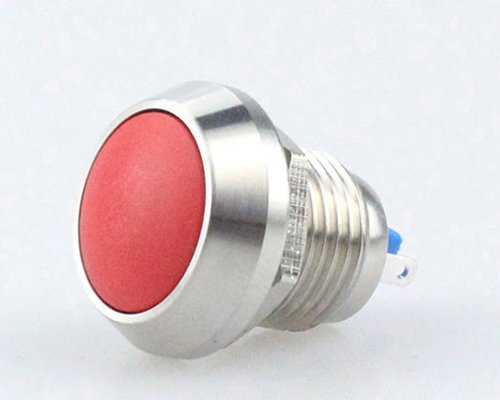
Domed Head: The button part is dome-shaped, protruding from the switch operation panel, and feels good when pressed by the thumb.
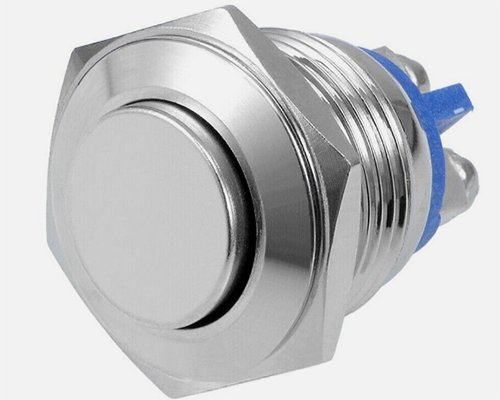
High Flat Head: The actuator has a high flat head, protruding about 1.2MM. These buttons are better suited for people with larger thumbs.
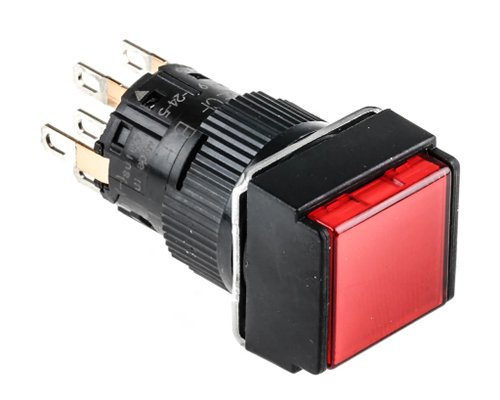
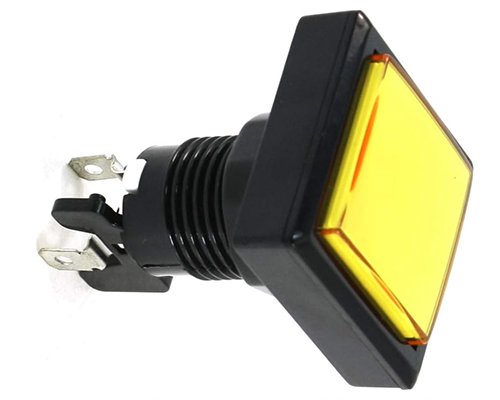
Square Head: The square-headed button has a wider surface, which can be illuminated or not. However, the aperture for installation is circular.
Rectangle Head: Typically used for plastic button switches, rectangle heads often have two buttons, one for starting and one for stopping. There are also smaller single-button rectangle heads that can be equipped with LED lights.
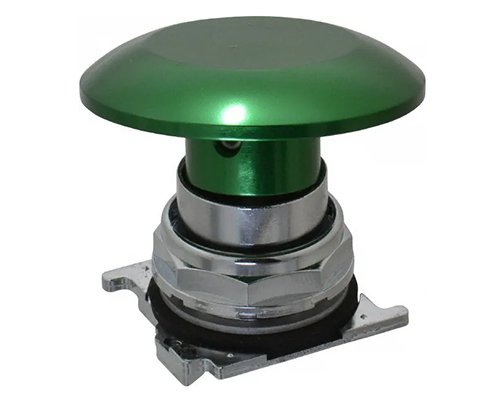
Mushroom Head: Usually an emergency stop switch. It can have a plastic head or a red anodized aluminum head, often with rotational direction indicated on it.
In conclusion, switch shapes mainly include the styles mentioned above. There are also some less common styles and custom designs. Detailed information can be found by searching relevant articles.
Advantages and Disadvantages of Push Button Switch
Advantages of Push Button Switch
Durability: Push button switches can withstand harsh outdoor weather and extreme temperatures. And they have a longer lifespan than other switches.
Easy to Clean: Push button switches have a smooth surface with no seams. Even in environments with lots of germs, they can be cleaned with a quick wipe with a disinfectant.
Instant Control: You can feel the feedback the button gives instantly by touch.
Effective in Emergencies: Elevator buttons and fire alarms still work during power flickers or screen malfunctions, effectively avoiding the complete paralysis of the system.
Disadvantages of Push Button Switch
Limited Customization: Pushbutton switches can’t be updated with labels at any time like digital screens.
Easily Damaged: Push button switches that are used frequently can become loose over time, and plastic buttons can break in freezing weather.
Difficult to Install: Installing a push button switch requires basic electrical skills. Connecting the wrong wires may pose a risk of electrocution.
Large Installation Space: The complex internal structure requires a mounting depth of 25-40 mm for push-button switches, which requires a bigger space for the control cabinet.
What’s Application of Push Button Switch
Push button switches have multiple functions and are therefore widely used. Push button switches can be seen on many devices in many industries, mainly in the following industries:
Home appliances: Button switches are simple to operate and durable, and are very suitable for use on equipment that requires easy operation. Common ones in life include elevators, various electrical appliances, remote controls, etc., which are easy to operate and easy to clean.
Outdoor equipment: The push button switch is made of excellent material, very safe and reliable, and has waterproof, dustproof and anti-corrosion properties, so it can be used in extreme outdoor weather, low visibility, or when the environment is shaking and unstable.
Industrial production: The reliable and durable features of push button switches can also operate stably in industrial environments, such as high temperatures, vibrations, dust, etc. in industrial environments. For example, processing, testing, and even automated equipment in industrial production will have higher requirements for spare parts. Therefore, push button switches are indispensable parts in the industrial field in terms of reliability, safety, and precise control.
Experimental equipment: The experimental environment and equipment have higher and more precise requirements for push button switches. The reliability and durability of push button switches can also meet the requirements of working in such an environment. The laboratory can also customize push button switches to better meet its needs.
Transportation field: Push button switches often appear on the control panels of trains, ships or airplanes. The advantages of easy operation, durability, and easy maintenance bring more suitable operation methods to these modes of transportation.
In summary, push button switches are indispensable components in both everyday life and production. With them, complex operations can become simple and safe.
Electrical Specifications and Ratings of Push Button Switch
Push button switches have different current, voltage and other parameters. Each series has different specifications and parameters based on different design requirements. Different specifications and parameters are used on different devices and can have a wider range of applications.
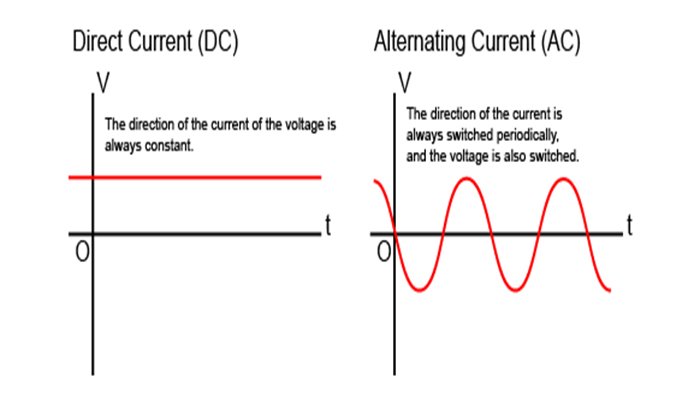
Rated Voltage: The maximum rated voltage is set from 24V to 250V, with DC and AC, and the range is wider. For example, if the maximum rated voltage is 24V DC, then devices within this range can use this push button switch.
Rated Current: This is the maximum rated current that the button switch can handle. If it exceeds the maximum rated current, the switch will be overloaded and damaged. Rated current ranges from 0.5A to 21A.
Mechanical Life: refers to the life of pressing the button without damaging the button without connecting the circuit. Buttons whose mechanical lifespan does not meet the standard will not be able to be pressed when the number of presses exceeds the standard.
Electrical Life: The electrical life of buttons with different voltages and currents is different. This refers to how many times the button switch can operate in the working state or when the circuit is connected.
Operating Temperature: Different series have different requirements for operating temperature. The minimum and maximum temperatures that the push button switch can withstand between the equipment and electrical. If the temperature is too high, the button will lose its function.
Protection Level: The push button switch can be dustproof and waterproof. Plastic materials have a lower protection level, while metal ones have a higher protection level.
Certification and Standards: The certification of push button switches includes CE, TUV, UL and other electronic and electrical certifications, as well as ROHS and REACH environmental certifications.
Tools and Materials Required to Wire a Push Button Switch
Whether you are connecting a plastic push button switch or a metal push button switch, you need to prepare some basic tools, such as wire strippers (for stripping insulation), screwdrivers (for fixing terminals), wires of different sizes, lengths and colors, and a multimeter (for testing connections). Secondly, in order to connect terminal devices, you can also prepare some terminals and connectors. Of course, you can ask the supplier to help you connect the lines during production.
How to Wire a Push Button Switch?
The 2 pin push button switch is the most basic of switches. It only has the two most basic functions of turning it on and off, so wiring this type of switch is also the simplest. Connect the power supply’s positive wire to one pin and the negative wire to the other pin to complete the circuit. When you turn on the power and press the switch, the circuit will open or close accordingly—press to activate, release to deactivate (or vice versa, depending on your wiring).
The 4 pin push button switch offers more functionality than the 2 pin switch, so its wiring is more complex. n different practical applications, its wiring is different. Here are common wiring methods for connecting lights and power sources
Method 1:Connect the common terminal of the switch to the positive side of the power supply. The NO/NC terminal is connected to one of the wires from the control device, and the other wire is connected to the negative side of the power supply. One of the pins of the LED is plugged into either the common or the NO/NC terminal. Which pin you choose depends on the relationship you need between the state of the LED and the switch. If you need the LED to light up when the switch is pressed, then connect to the NO/NC terminal; if you need to release the button when the LED ends are connected to the common terminal, the other pin of the LED is connected to the positive or negative terminal of the power supply.
Method 2:Connect the lamp and power supply. All other steps are the same, the difference is that the positive terminal of the power supply is connected to the common terminal. The NO /NC terminal is connected to the positive terminal of the LED, and the negative terminal of the power supply is connected to the negative terminal of the LED.
Method 3:Connect the pins of the LED to the positive and negative terminals of the power supply. Then connect the common terminal to one end of the power supply and the other end to the NO /NC terminal. In this case, the LED is always on and not limited by the switching state. Alternatively, connect the common terminal to the positive terminal of the power supply. Then connect the NO/NC terminal to the positive LED terminal and the negative LED terminal to the ground. In this case, the state of the switch can also control the state of the LED.
The difference between a 5 pin push button switch and a 4 pin push button switch is that the NO /NC terminals no longer share the same pin as the 4 pin, but have a separate pin on the NO /NC terminal. The same example of a common connection to a battery and a lamp connection is shown:
Method 1:In the case where there is no lamp but only a battery, the first step is to connect the positive end of the battery to the common pin. Then connect one end of the load to the NO or NC pin and the other end to the negative side of the power supply. If you connect the NO pin, the load energizes when the switch is pressed. If you connect the NC pin, the load is de-energized when the switch is pressed. With an LED indicator, connect the NO or NC terminal and the common terminal as above. Then just connect the positive terminal of the LED to the positive terminal of the power supply and the negative terminal of the LED to the negative terminal of the power supply.
Method 2:In the case of both the lamp and the LED, the positive terminal of the battery is connected to the positive terminal as well as the common terminal of the LED. The negative terminal of the battery is connected to the negative terminal of the lamp and the LED. Then the positive terminal of the lamp is connected to the NO /NC terminal according to the function you need.
Method 3:When the positive terminal of the battery is connected to the common terminal of the switch, the negative terminal of the battery is connected to the negative terminal of the LED and the negative terminal of the lamp. The positive terminal of the LED is connected to the positive terminal of the lamp and the NO or NC terminal. When the NO terminal is connected, press the switch to start the device. When the NC terminal is connected, press the switch to pause the device.
The 6 pin push button switch mainly has two NO/NC and the corresponding two common terminals. We generally call NO1 and NC1 corresponding to the common terminal COM1, the other is NO2 and NC2 corresponding to COM2. they are independent, so the 6 pin pushbutton switch has a single circuit wiring and double circuit wiring in two cases.
Single Circuit Wiring: Connect the positive terminal of the battery to COM1. One end of the load is connected to the negative terminal of the battery, and the other end is connected to NO1 or NC1. Press the switch to energize the device if NO1 is connected, and press the switch to de-energize the device if NC1 is connected.
Double Circuit Wiring: Connect the positive terminal of the battery to both common terminals, and the loads of the two circuits are connected to the corresponding NO/NC terminals. For example, the load of circuit 1 is connected to NO1 or NC1, and the load of circuit 2 is connected to NO2 or NC2.
Troubleshooting Tips
Switch Doesn’t Work
Loose connections are the most common culprit. Tighten all terminal screws and ensure wires are fully inserted. Verify that you’ve used the NO terminal for “on” functions.
Overheating
Overheating is usually an indication that the current rating of the switch does not match the load. For example, a 10 amp switch will overheat when powering a 15 amp heater. You will need to upgrade to a switch with a higher current rating or add a relay.
Flicker
Dirty or corroded contacts may cause flickering. Disassemble the switch after disconnecting the power and clean the terminals with an electrical contact cleaner. Replace the switch if the contacts are worn or damaged.
FAQ
How to Choose The Right Push Button Switch?
Choose plastic or metal button switches according to the usage scenario, and choose buttons with appropriate apertures.
What’s The IP Rating of The Push Button Switch?
The protection levels of general push button switches are around IP45 and 65, and those with better protection levels can reach the highest level of IP68.
What Are The Common Enclosure Materials for Push Button Switch?
Common materials include plastic, stainless steel, nickel-plated brass, and anodized aluminum.
What Are The Customization of Push Button Switch?
Customization of push button switches includes different heads, light transmission of different symbols in the button area, wiring methods, and customization of non-standard sizes.
What Are The Forms of Push Button Switch Terminals?
The connection terminals of the switch include welding terminals, quick connection terminals, screw terminals, cable terminals and other terminal forms.
What Happens If The Connection Is Wrong?
Reversing NO and NC terminals can cause devices to turn on when they should be off, or vice versa. In safety systems, this might disable emergency stops—always double-check wiring.